Khao Man Gai Recipe – Thai Street Food Style (วิธีทำข้าวมันไก่)
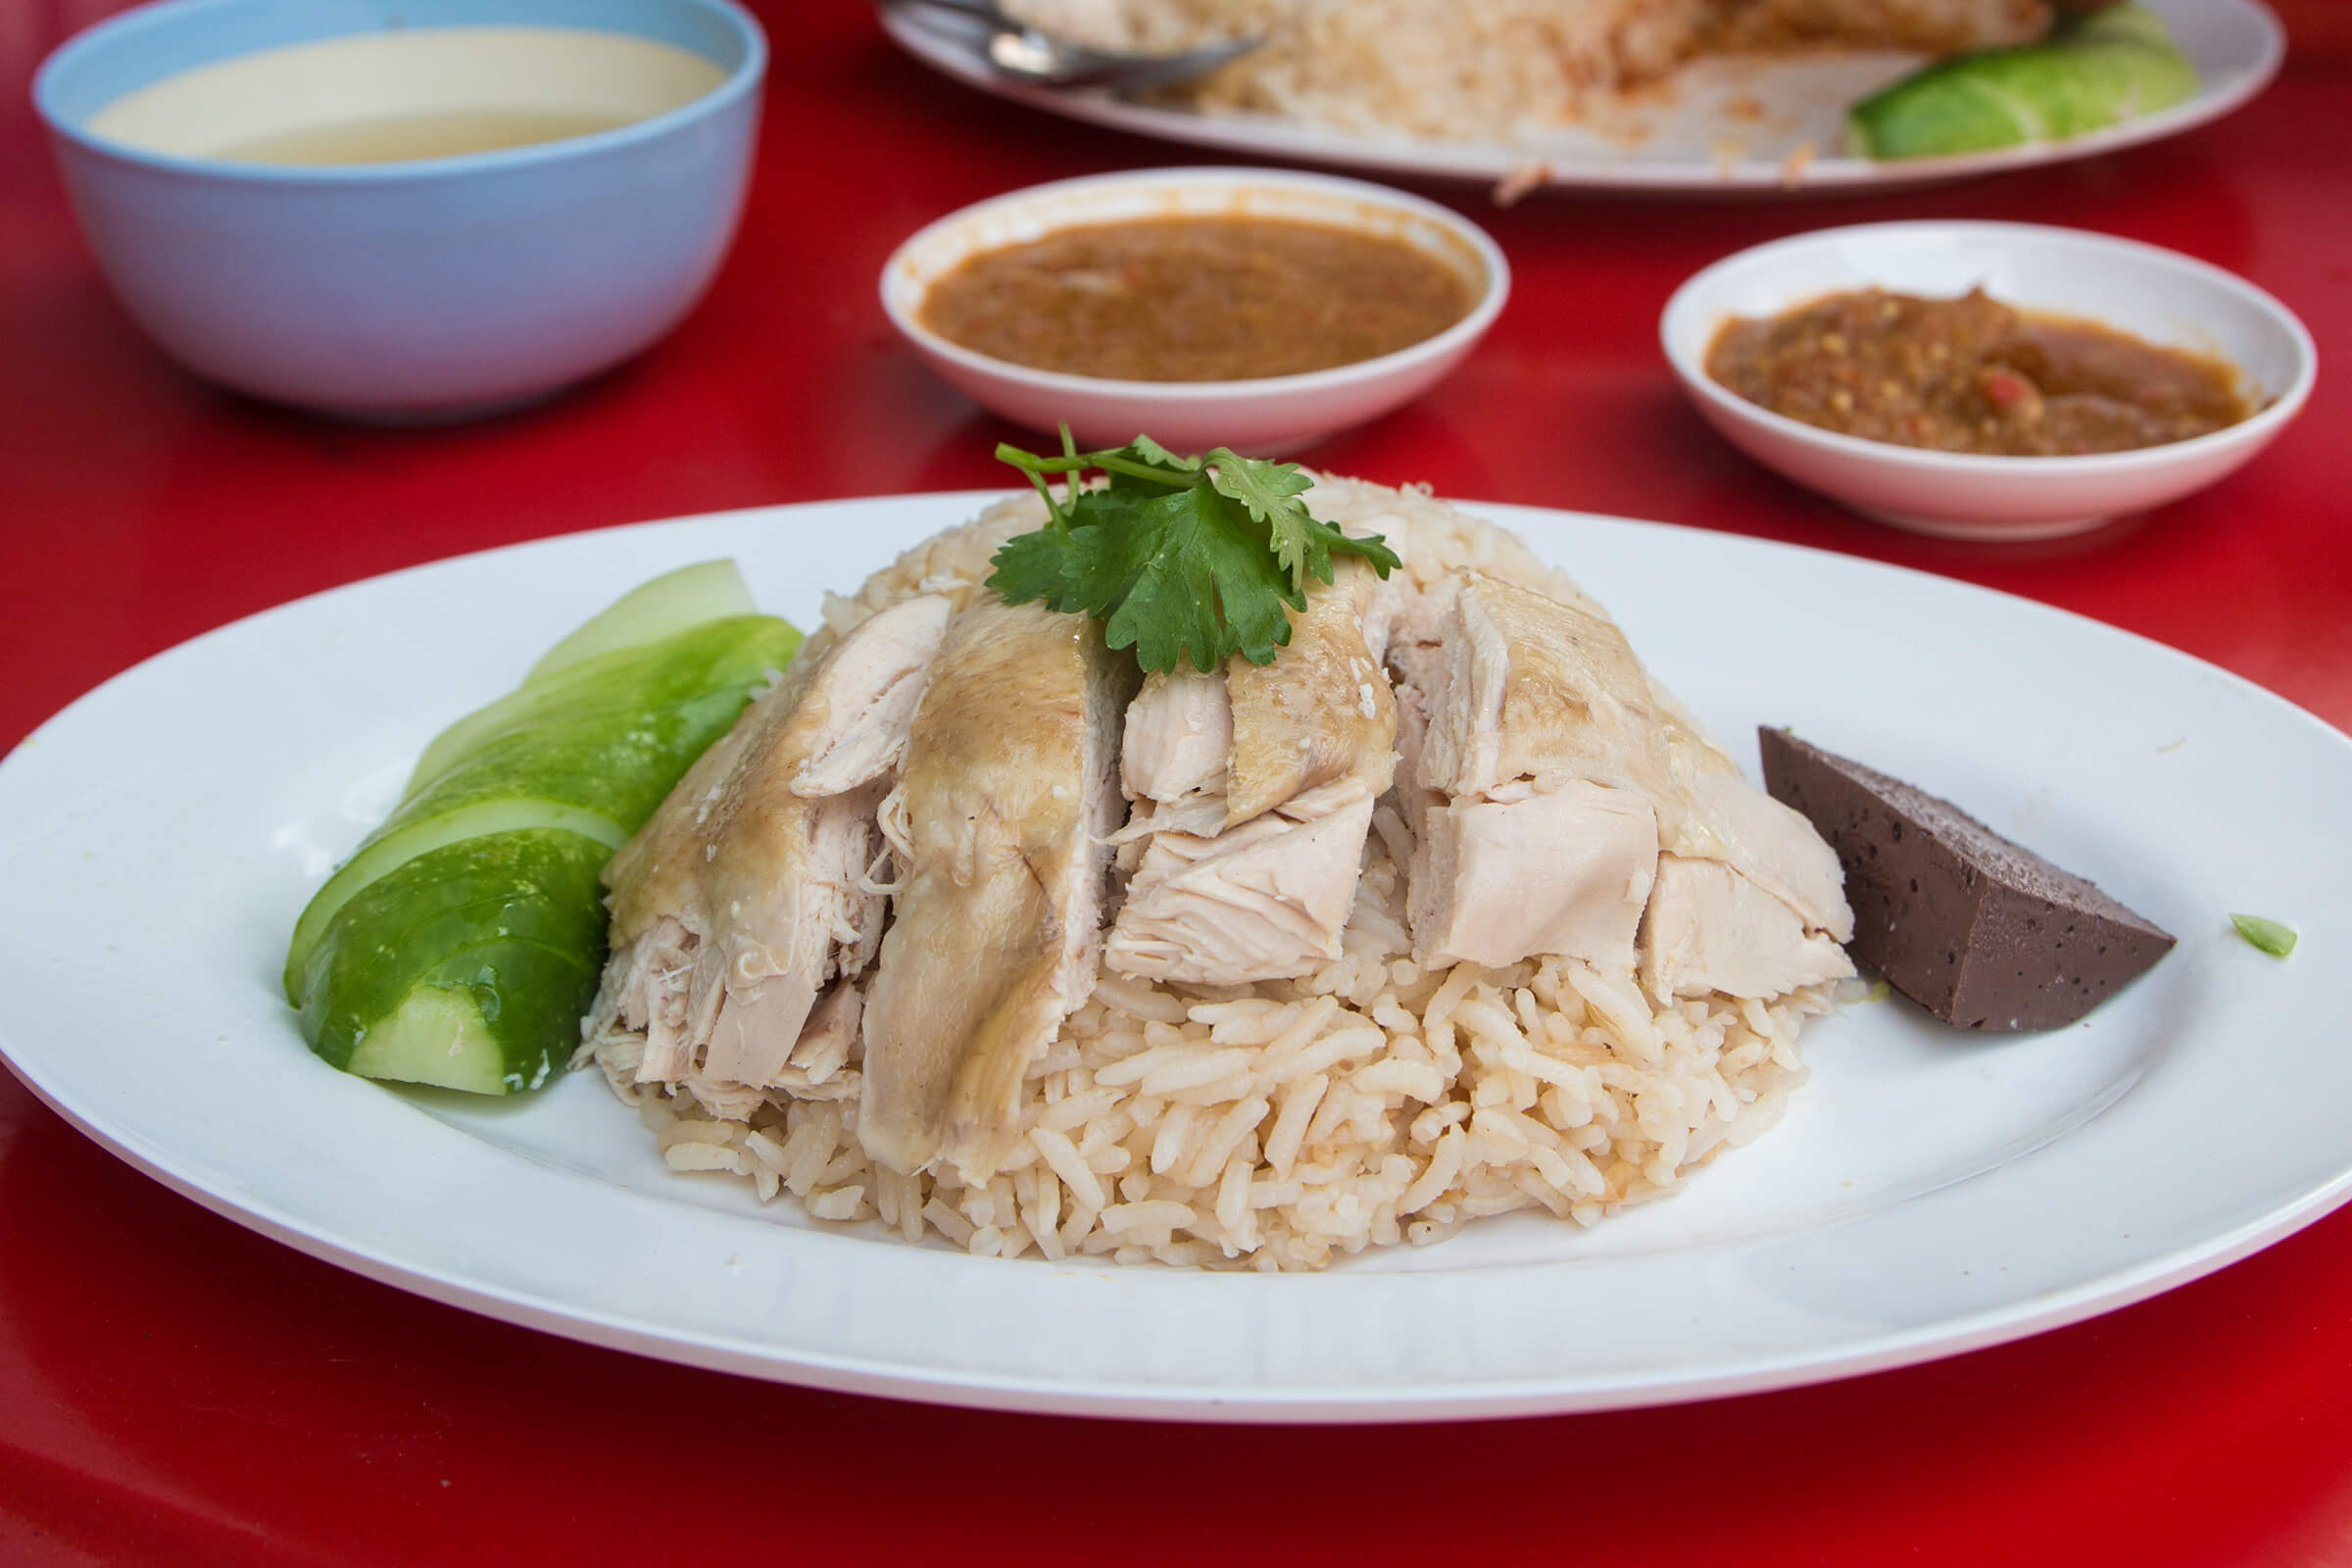
In this blog post I’m going to share with you my mother in-laws Thai chicken rice khao man gai recipe.
Khao man gai (ข้าวมันไก่) is the Thai variation of Hainanese chicken rice, a dish that’s extremely popular throughout Southeast Asia.
In Thailand, specifically throughout Bangkok, you can’t walk more than a few blocks without finding a chicken rice cart or restaurant (same goes for Chiang Mai).
Keep reading for the full story and how to make Thai style street food chicken rice!

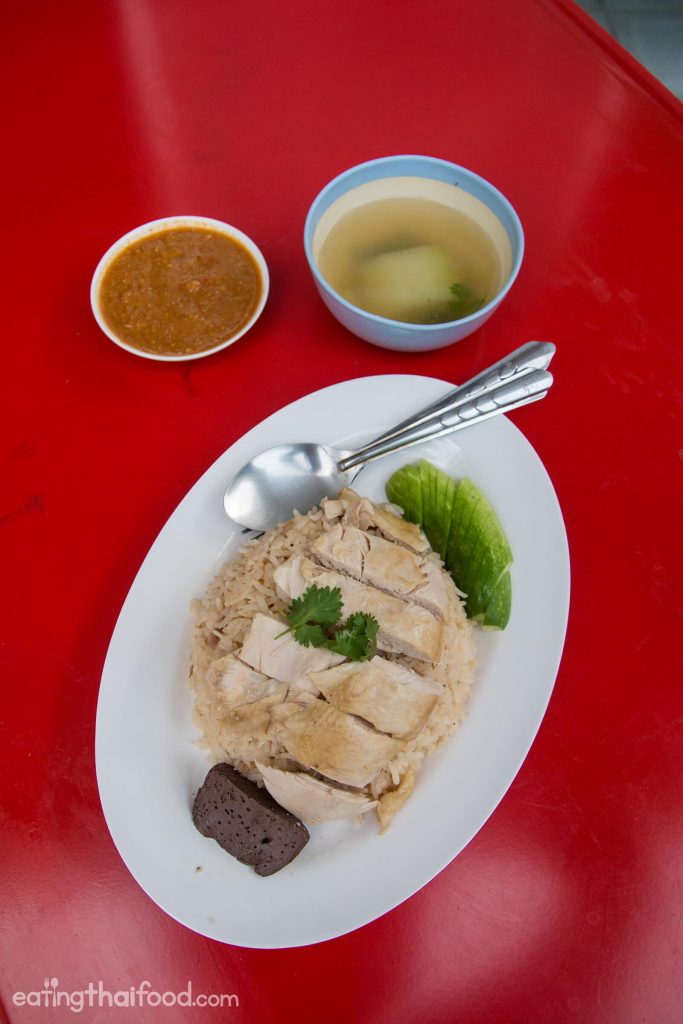
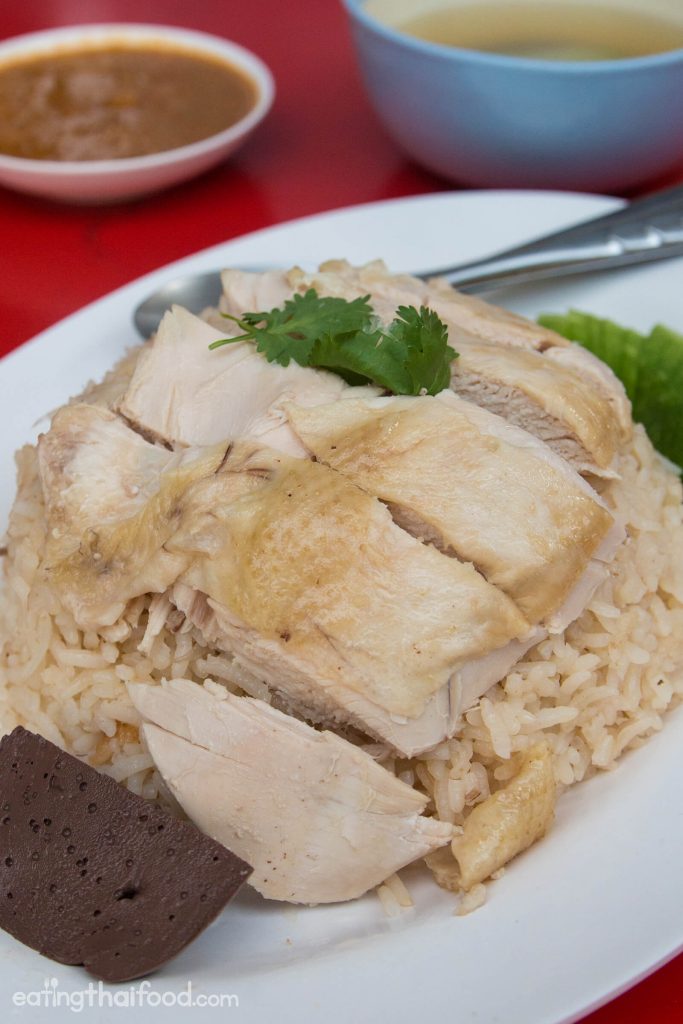
Khao man gai (ข้าวมันไก่) chicken ready to be eaten
I always thought khao man gai (ข้าวมันไก่) was such an easy to make, not very time consuming Thai recipe.
That’s sort of right, but to do it correctly, requires quite a bit of time — a few hours at minimum.
Though there are many parts to this recipe, it’s pretty easy to follow, and you should be able to get the ingredients quite easily no matter where you live (at least if you live as long as you have access to an Asian supermarket or market).

Authentic Thai street food recipes and adventures
Important – read this first
For this khao man gai recipe (วิธีทำข้าวมันไก่), and in the video (which you should watch now, below or here), I made a party sized batch, 4 chickens and a proportional amount of rice.
I’m going to write down the ingredients I used for 4 chickens (we fed about 20 people) along with the following photos, but in the real recipe (further below, formatted section), I’ve gone ahead and reduced all the ingredients to ¼, or just 1 chicken (should feed about 4).
Also, there are 5 parts to this recipe:
- Chicken
- Rice
- Soup
- Sauce
- Serving it Thai style
Let’s get started…

Thai version of Hainanese chicken rice
What is khao man gai (ข้าวมันไก่)?
Khao man gai (ข้าวมันไก่) is a relatively simple tasting dish, nothing is too strong in flavor or spice (apart from the sauce).
It’s always a comforting dish, and in Thailand it’s eaten at makeshift street food stalls and shop house restaurants, and it’s always extremely common for takeaway, where it’s wrapped up in a piece of paper to-go.
There are a few different components that make up any bowl of Thai street food khao man gai (ข้าวมันไก่), including boiled chicken, rice cooked in the chicken broth and oil, sauce, and finally a chicken soup side.

First step is to boil the chicken
Part 1: Boil the chicken (วิธีต้มไก่)
Ingredients:
- 4 whole chickens
- 2 tbsp. salt
- Water to cover chickens
Depending on how you buy your whole chickens, the first step is to take out all the organs – in Thailand I got full chickens, with head on and still filled with its organs.

Not the most attractive photo, but someones got to do it!
So the first thing to do is prepare your raw whole chicken. First give it a wash, and take off any feather stubs that might be in it, as well as any of the outer skin.
To remove the innards, you need to take a knife and cut a small hole in the back of the chicken (under the butt), and then reach with your hand to carefully remove the entire organ system.

There it is, the organ system removed…
You do need to be careful on this step, because you don’t want to rupture some of the organs, like the intestines, which could cause some parts of your chicken to taste a bit bitter. Just carefully remove all of the organs so you have an empty cavity in the chicken.
The next step is to stuff the feet into the body cavity, and twist the wings into a knot at the top of the chicken – I think this is just the Thai traditional way to do it, so the limbs and feet aren’t flapping around when boiling.
Next step is to take a pot that’s big enough for your chickens, and fill it with enough water to cover your chicken.
Turn on the heat and first boil the water.
When your water is boiling, add in the salt, and mix it around to dissolve it.
Then reduce your heat to low, and add in your chickens.
You can rearrange them to make sure they are all laying flat and all covered by water so they are evenly cooked. Then put your lid on, and just slowly boil the chickens, monitoring them every now and then.
For my 4 chickens, they took right at 45 minutes to finish cooking, but if you’re doing a smaller recipe, it might only take 30 – 40 minutes, and it also depends on the size of your chicken.
If you happen to have a cooking thermometer, that might be useful.

Let the chicken cool down
The chicken should be bouncy but firm, and then once you’re determined they are fully cooked, take them out of the water and set them into a cooling tray or pan.
Chicken rice in China and in Singapore, the chicken is often boiled, then doused in a bath of ice water, in Thailand that is usually not the case, especially for street food style khao man gai (ข้าวมันไก่) – instead the chicken is just boiled and left to cool down on its own.

My favorite part was hanging the chickens
For the authentic Thai street food style, you’ll see chickens for khao man gai (ข้าวมันไก่) hanging in a glass street food cabinet.
This doesn’t really make any different for the actual recipe of the dish, but it’s just a way to showcase what you serve.
That’s it for part 1 of how to make khao man gai (วิธีทำข้าวมันไก่). Just allow the chickens to cool down, probably for at least 30 minutes to an hour.
Now we’ll get started preparing everything else.

Preparing the rice
Part 2: Rice (วิธีหุงข้าวมัน)
Some people say it’s the rice and some people say it’s the sauce that either makes or breaks a plate of chicken rice. Whatever you choose, the rice is just as important as the chicken in this recipe for khao man gai (วิธีทำข้าวมันไก่).
In Thai, khao man, actually translates to oily rice (ข้าวมัน), and in this case, chicken oily rice.
Ingredients:
- 2 kg. uncooked rice (I used good quality Thai jasmine rice for this recipe)
- About 3.5 liters of chicken broth (this was an estimate, really you should use about 1 cup of rice to 1 and ½ cups of chicken broth) – You could also use boxed chicken broth.
- ½ tbsp. salt
- 200 g. Thai garlic (or regular garlic)
- Chicken oil for frying (any kind of vegetable oil is alright too), if you’re going to use chicken oil, you’ll need about 1 kg. of chicken skin to get the oil

Making chicken oil (but you can also use vegetable oil)
For the authentic recipe, you need to start by frying garlic in chicken fat oil.
If you don’t already have chicken oil, the first step is to take some chicken skin, stick it in a hot pan, and cook it until all the oil comes out – should take about 10 minutes or so.
It was honestly a little gross to me, seeing all that chicken oil come out of the skin, but the flavor results were quite wonderful.
Anyway, once the chicken skin is toasted brown and crispy, and all the oil has been released, you can then drain the pieces of chicken skin, because we’ll only be using the oil.
Alternatively, you can also just choose to use normal vegetable oil to fry your garlic, but chicken oil is the street food way.

Thai garlic
I’m using Thai garlic, which are small, sweet and fragrant cloves, for this recipe. But if you can’t find the small cloves of Thai garlic, you can alternatively use normal garlic.
You don’t need to even peel the garlic, just toss it all into a food processor or blender, and blend it up.

Deep fry the garlic in chicken oil
Using the hot chicken oil, deep fry the garlic on a low to medium heat. You’ll probably have to stir it continually to make sure the garlic doesn’t burn or stick to the pan.
It took me about 8 minutes to fry the garlic. You’re looking for a nice brown toasted color, and the garlic should be extremely fragrant and smell amazing.
Then you can turn off your heat, and drain and strain the garlic – we’re not going to use the oil, and then only the garlic fried in the oil.

Fried garlic, add to rice
For the rice, I’m using high quality jasmine rice, and cooking it in a normal rice cooker. The first step is to give the uncooked rice a good rinse with water, and then drain it.
Then add in all that beautiful fried garlic, which should be a golden color.

Stir it up with chicken broth
Normally for Thai jasmine rice, the ratio is about 1 part uncooked rice to 1.5 – 2 parts liquid. I did about 1 to 1.8 or so, and it cooked perfectly.
Instead of using water to cook your rice, instead we’ll be using the chicken broth straight from the pot. After adding the broth, you can also add in a pinch of salt, up to your preference.
Once you’ve got your rice in the pot ready, give it a quick stir to make sure all the ingredients are evenly distributed and mixed through, then flatten out your rice, and press cook on the rice cooker.
The rice will probably take about 30 – 40 minutes, and once it’s finished cooking just let it sit for another few minutes. After that, open the cover, and you can give the rice a stir, making sure if fluffs up.

Vegetables for the soup
Part 3: Chicken soup (วิธีทำซุป)
Whenever you order a plate of khao man gai (ข้าวมันไก่) in Thailand, you’ll always be served a side bowl of plain chicken soup. It’s not meant to be too flavorful, mostly just a light chicken broth.
Ingredients:
- Remaining chicken broth
- 1 – 2 winter-melons (½ kg each) – you could also use daikon radish
- Handful of fresh cilantro
- Salt to taste
- Pepper to taste
All you need to do is chop up your winter melon or daikon radish into pieces.
If you’re using winter melon like I did, first slice off the skin, then cut it into quarters, remove all the seeds and then just cut it into pieces, about 5 cm long.

Skim off that top layer of oil
Go back to your pot of broth, and by now it should have cooled down quite a bit, and you want to skim off that top layer of chicken oil – there should be quite a lot of oil on top.
Then turn on the fire, let the soup come to a boil, and you can add in all of your winter melon.

Boil the winter melon
As your soup is boiling, you can add in salt and pepper to taste. Your chicken soup doesn’t need to be too salty or too flavorful, it’s mostly a light chicken soup to accompany the main dish.
I boiled my soup for about 10 – 15 minutes, just to make sure the winter melon was soft.

Chicken soup
For making your soup, the final step is to turn off the heat, chop up a handful of cilantro, toss it in, and give it a quick stir. You don’t want to really boil the cilantro as it will lose its flavor and turn bitter.
Soup ready, you can either serve it right away, or you can let it sit, and re-heat it when you serve the full khao man gai dish.

Making the sauce
Part 4: Thai khao man gai sauce (วิธีทำน้ำจิ้มข้าวมันไก่)
Ingredients (3x smaller recipe below):
- 150 g. ginger (strong ginger, as opposed to lesser pungent young ginger)
- 150 g. garlic (note: I didn’t peel my garlic because I used a certain type of Thai garlic, but if you use normal garlic you should probably peel it before blending so it doesn’t get stuck)
- 50 g. Thai bird chilies (20 – 30 chilies)
- 4 stalks of cilantro roots
- 8 – 10 tbsp. fermented soy bean sauce (เต้าเจี้ยว) – this sauce can be very salty, so better to add less first and then add more. I normally use Healthy Boy brand, but if you can’t find that, you can try Chinese fermented soybean sauce.
- 6 tbsp. white vinegar
- 3 tbsp. sugar
- 1.5 tbsp. dark sweet soy sauce
- 1 – 2 cups of chicken broth (start with about 1 cup and if it’s too thick, you can add more broth)
- Cucumbers to garnish
- Cilantro to garnish

Fermented soy bean sauce, tao jeow (เต้าเจี้ยว)
One of the main ingredients in Thai chicken rice sauce is fermented soy bean sauce, known in Thai as tao jeow (เต้าเจี้ยว).
For the vinegar, don’t use rice vinegar or apple cider vinegar, but you just want neutral distilled white vinegar.
There’s no need to add any extra salt as the fermented soy bean sauce is already extremely salty.

Some of the sauce ingredients
Once you have all the ingredients ready to go, making the khao man gai sauce (วิธีทำน้ำจิ้มข้าวมันไก่) is actually quite easy.

Blend everything together
Just chop up the ginger, and toss everything into a blender. You want to blend everything up, and it’s really up to you how pureed you want it to be – some like it chunky, others like it more smooth. I like a medium blend.
The next step is to taste test – this is important.
If it’s too salty, you can water it down with more chicken broth from your soup.
Remember though, the sauce will be eaten with plain rice and chicken – so it can be a little on the salty side. At first I was taste testing it by itself, and it was very salty, but with the rice and chicken it was perfect.
The final step is to toss all your sauce into a pot or wok and bring it to a boil, then turn it off. I’m not totally sure why (my mother in-law said we needed to do that), but that’s what all Thais do for marking khao man gai sauce, and I think it’s just to kill bacteria and bring the sauce together.

Khao mang gai sauce
To serve the khao man gai sauce Thai style, put it into a small individual sauce dish, or you can serve it from a big communal bowl.
The sauce is best eaten on the same day, but it should keep for a few days in the fridge.

Street food style!
Part 5. Serving khao man gai, street food style
Ok, so once you have all the components ready, the fun part of this recipe is assembling a full plate of authentic Thai style khao man gai (ข้าวมันไก่).
I normally take a small soup bowl, fill it with rice, pat it down, and then empty it onto a serving plate, so the rice has the bowl formation.

Cutting up the chicken
Then you want slice up your chicken using a nice sharp cleaver. I love to use Kiwi knives!
The easiest thing to do is to cut off the legs and thighs and wings, and then depending on if you want white or dark meat, you can slice off the chicken breasts, or debone the meat from the thigh.
The Thai way is to get your chicken, give it a smash with the side of a cleaver to flatten it out, and then chop it into bite sized pieces. Then place your chicken on top of the pile of rice.

Khao man gai served!
You can then take a cucumber, slice a few wedges, and serve it next to the chicken and rice.
Same goes with cilantro, often just a few sprigs of cilantro will be sprinkled on top. But I like to eat a whole handful of it.
- Here’s how to serve a proper portion of khao man gai (ข้าวมันไก่), Thai street food style
- Thai khao man gai!
Dish out a bowl of soup, put some sauce into a small sauce bowl, and you have just served up an authentic plate of khao man gai (ข้าวมันไก่)!
In Thailand you normally eat with a spoon and fork, where your spoon is the main tool, and your fork is there to just shovel bites onto your spoon.

I like to drown every bite in sauce
Eating khao man gai Thai style, you can first take some sauce in your spoon, put it onto a piece of chicken, mix it slightly with the rice, get a well rounded bite of rice, chicken, and sauce on your spoon, and take a bite. Then take a sip of your soup. Repeat.
First watch the video…
(If you can’t see the video, watch on YouTube here)
Thai khao man gai recipe (วิธีทำข้าวมันไก่)
NOTE: Remember, the recipe below is for a 1 chicken sized recipe (serves 4 – 5 maybe), and the recipe ingredients above, is for the exact recipe I made in the video – 4 whole chickens – party sized… but directions and method are all the same.
Time: Probably about 2 – 3 hours
Recipe size: 1 chicken and rice to go with it (but above is for 4 chickens)
Utensils: Big pots, blender
Flavors: Comforting chicken and rice
Eat it with: This is a full meal combination Thai dish
For more Thai street food recipes, click here.
- 1 whole chicken
- ½ tbsp. salt
- Water to cover chicken
- ½ kg. uncooked rice (I used high quality Thai jasmine rice, nice and fragrant)
- About ½ liter of chicken stock broth (this was an estimate, really you should use about 1 cup of rice to 1.8 cups of chicken broth, or whatever ratio you normally use)
- ⅛ tbsp. salt
- 50 g. Thai garlic (regular garlic will work too)
- Chicken oil for frying (or vegetable oil will work well too)
- All the rest of the chicken broth
- ½ winter melon (about ½ kg or so) - you can also use daikon radish, or even nothing
- Sprigs of cilantro
- Salt to taste
- Pepper to taste
- 50 g. ginger (old and strong ginger is best)
- 50 g. garlic (peel the garlic)
- 5 - 10 Thai bird chilies (depending on how spicy you want it)
- 1 stalk of cilantro roots
- About 3 tbsp. of fermented soy bean sauce (you can add more later if not salty enough, but it can be quite salty), if you can find the Thai version, that will be best)
- 2 tbsp. white vinegar (normal distilled white vinegar, NOT apple cider or rice)
- 1 tbsp. sugar
- ½ tbsp. dark soy sauce (kecap manis)
- About ¼ - ½ cup of chicken broth, but more if it's too salty or too thick
- Cucumbers to garnish
- Cilantro to garnish
- I’m not sure how you will buy your chickens, but in Thailand, I went to the market, and bought full chickens, which come with head and all insides in-tact. If your chicken hasn’t been de-gutted, you’ll need to first carefully remove the entire organ system. You have to cut a slit in the back of the chicken, about 6 cm in length, and then reach in with your hand to remove all the organs. Be careful not to break the intestines or innards as it can cause the chicken to get bitter.
- Once your chicken is de-gutted, stuff the feet of the chicken into the body cavity, and then twist the wings to the top of the chicken - this is just going to keep its limbs from flapping while being boiled.
- Put enough water into a pot to cover your chicken, and then bring it to a boil (chickens not in yet). Once your water is boiling, reduce the heat to low.
- Add the salt into the water and dissolve it.
- Add the chickens to the boiling water and boil them for about 35 - 45 minutes, if you’re only doing one chicken it might only take 30 - 40 minutes - so just keep an eye on it. If you have a meat thermometer, that could come in handy.
- Once the chicken is firm and bouncy, you can remove the chicken from the pot, and lay it in a pan to cool.
- That’s it for the boiled chicken.
- For a proper Thai street food version of khao man gai (ข้าวมันไก่), you need to have some chicken oil. I made some by taking extra chicken skin, putting it into a hot wok for about 10 minutes and sizzling all the oil out of it - we probably had about 1.5 cups of chicken oil. However, if you don’t want to use chicken oil, you can also just use any kind of vegetable oil.
- Take the garlic, and blend it up, or use a food processor. Alternatively, you can just mince it up as well. In Thailand they just use the full cloves of garlic, without even taking off the skin.
- Then take the minced garlic and deep fry it in either the chicken oil or vegetable oil. You want to fry it on a medium low heat, and stir it continually in the oil so the garlic doesn’t stick. You want the garlic to become nice and golden brown, without burning or getting too dark. It should take about 5 - 8 minutes.
- Once your garlic has been fried, strain and drain it.
- Add your uncooked rice to a rice cooker pot, and first give it a good rinse and drain.
- Add the fried garlic to the uncooked rice, along with the chicken broth (from cooking the chicken), and a bit of salt to taste.
- Stir the uncooked rice and broth all around, even it out in the pot, and finally press cook on your rice cooker. Let the rice cooker work its magic.
- When the rice finishes cooking, let it sit for a few minutes, and then open the cover and just fluff it up.
- Cut up your winter melon or daikon radish into about 5 cm pieces. For the winter melon, I first sliced off the skin, then cut it into quarters, removed the seeds, and sliced it into pieces.
- Go over to your chicken broth, and try to skim off the top layer of oil, and discard.
- Now bring your chicken broth to a boil, and then add in the pieces of winter melon or radish.
- While your soup is boiling, you can go ahead and add in as much salt and pepper to your tasting. It shouldn’t be too salty or too peppery, you’re looking for just a soothing broth.
- Boil your soup for about 15 minutes or so, until the winter melon or daikon radish is soft.
- Final step for the soup is to turn off the heat, take a handful of cilantro, chop it up, and toss it in. Give that a quick stir, and it's ready.
- For the sauce, just chop up the ginger, and then just throw it, with all of the ingredients into a blender or food processor.
- You don’t need to blend it up completely, it can be a little chunky (depending on your preference).
- Transfer your blended sauce over to a pot or wok, and you want to just bring it to a boil for a few seconds - this is not really for any reason other than to kill any bacteria and make your sauce last longer (this sauce should last in the fridge for about 3 - 4 days, but of course it probably tastes the best when it’s freshest).
- Pour the sauce into a bowl and it’s ready to be eaten.
You know what the best part about making this khao man gai recipe (ข้าวมันไก่) yourself is…?
You can serve yourself as much chicken as you want… you can even eat a whole chicken yourself if you’d like!
At a street food stall, you’ll normally only get a few bites of chicken for a 30 THB ($1) plate, but when you make it yourself, you can eat the whole chicken!

Delicious Thai khao man gai at home!
Conclusion
Khao man gai (ข้าวมันไก่), the Thai version of Hainanese chicken rice, is one of the most typical and widely available street food dishes you’ll find throughout Thailand.
This khao man gai recipe (วิธีทำข้าวมันไก่) is not difficult to make, you just need to get all the ingredients, and spend the time to properly prepare each of the components, which are all based around boiled chicken.
A bite of boiled chicken paired with fragrant chicken flavored rice, doused in ginger chili sauce, is a recipe for comfort food at its finest.
Hope you enjoyed this Thai street food recipe, be sure to leave me a comment below, I’d love to hear from you!

